

How to Clean a Toilet Brush: Easy Step-by-Step Guide
The fastest way to clean a toilet brush is to soak it in water, scrub away any buildup, rinse it thoroughly, disinfect it, and let it air dry completely before storing it. This removes bacteria, mineral stains, and lingering odors that build up with regular use.
A toilet brush needs more than a quick rinse now and then. Left wet in its holder, it can become a breeding ground for bacteria, mold, and unpleasant odors between cleanings. The good news is that cleaning one properly can take less than 10 minutes and doesn't require anything you most likely don't already have under the sink.
| Step | What to Do | Why It Matters |
|---|---|---|
| Soak | Submerge the bristles in water for 5 to 10 minutes | Loosens dried-on grime and buildup before scrubbing |
| Scrub | Work an old toothbrush or small scrub brush through the bristles and around the base | Helps remove stuck-on residue, mineral deposits, and limescale |
| Rinse | Rinse thoroughly under running water until the water runs clear | Removes loosened debris and cleaning-product residue |
| Disinfect | Apply a suitable disinfectant according to its label instructions | Helps reduce bacteria and other germs on the brush |
| Dry | Let the brush air-dry completely somewhere with good airflow | Reduces lingering moisture, odors, and mold growth |
| Clean the Holder | Empty, wash, and disinfect the holder separately, then let it dry | Prevents moisture and residue from building up around the brush |
| Clean Up | Wash the bucket and reusable gloves; discard disposable gloves and any disposable cleaning tools | Keeps the tools you used from carrying bathroom germs elsewhere |
How to Clean a Toilet Brush (Step-by-Step)
Gather What You'll Need
Before you start, put on a pair of rubber gloves. The bristles carry bacteria you don't want on your hands, and you'll likely be handling bleach or another disinfectant. Beyond that, you just need:
-
A disinfectant
-
An old toothbrush or small scrub brush
-
A bucket, or the toilet bowl itself
-
Paper towels for drying surfaces afterward
-
Optional face mask to protect you from breathing in the fumes
Let the Brush Soak First
Fill a bucket with water and submerge the bristles for 5 to 10 minutes. If you don't want to dirty a bucket, you can do this directly in the toilet bowl before you flush, just make sure the bowl itself is otherwise clean. Soaking helps loosen dried-on grime and buildup, making the brush easier to clean without having to scrub aggressively.
Scrub Away Buildup and Stains
Once the brush has soaked, work an old toothbrush or a small scrub brush through the bristles, paying close attention to the base where the bristles meet the handle. That's usually where mineral deposits and limescale build up first, especially in homes with hard water.
Rinse the Brush Thoroughly
Rinse under hot running water until it runs clear and you no longer see suds or debris. If you soaked the brush in the toilet bowl, flush a couple of times while running the bristles under the water stream to clear out any leftover residue.
Disinfect the Brush
For a deeper clean, use a household disinfectant that is suitable for the brush's material and follow the product's dilution and contact-time instructions. If you choose to use bleach, the CDC recommends following the bleach label or, when no directions are available, using ⅓ cup of regular household bleach per gallon of room-temperature water and keeping the surface visibly wet for at least one minute before rinsing.
One thing worth being careful about: never mix bleach with vinegar, ammonia, or any other cleaning product. The combination can release toxic fumes. Stick to one disinfectant at a time, keep the bathroom door open or a window cracked for ventilation, and keep your gloves on while you work.
Let It Air Dry Completely
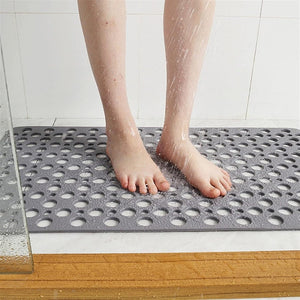
This is the step that matters most for keeping odors away. Prop the brush upright somewhere with airflow – resting the handle against the wall behind the toilet or hanging it over the edge of the bowl works fine, but ideally you’ll dry it on a balcony or by an open window – rather than putting it straight back into a closed holder while it's still damp. A brush that dries trapped and wet is what grows mold and bacteria between cleanings. The same principle applies to other bathroom storage: bathrooms tend to be humid, so choosing items that drain water easily or allow air to circulate can help keep the space cleaner and drier.
Don't Forget to Clean the Holder
The holder sits next to the toilet and catches drips every time you use the brush, so it can also collect residue, moisture, and bacteria. Wipe it out with the same disinfectant you used on the brush, and let it dry fully before putting the brush back.
Clean Up After You're Done
Don't forget about the tools you used to clean the brush. If you're wearing disposable gloves, remove them carefully and throw them away, then wash your hands thoroughly. Reusable rubber gloves should be washed and allowed to dry completely before storing them. Wash the bucket with soap and water after use and disinfect it if appropriate for the material. Any old toothbrush or scrub brush used for this job should be kept exclusively for bathroom cleaning or discarded rather than used for cleaning anything that comes into contact with food.

How Often Should You Clean a Toilet Brush?
For most households, a thorough toilet brush cleaning once a week is a reasonable starting point. The exact frequency depends on how often the brush is used, though. A brush in a single-person household may stay relatively clean with weekly disinfection, while one used several times a day by a large family will accumulate more residue and moisture and may need more frequent cleaning. The same applies if someone in the household is sick or if the brush is used to clean particularly dirty surfaces.
It is also worth paying attention to the condition of the brush rather than relying on a strict schedule. A persistent smell, slimy residue on the bristles, discoloration, or dirty water collecting in the holder are all signs that the brush needs cleaning sooner. If the brush still smells unpleasant or looks visibly dirty immediately after cleaning, the problem may not be how often you clean it but how well it dries between uses. Moisture trapped in the bristles and holder gives bacteria and mold more opportunity to multiply, which is why thorough drying is just as important as regular disinfection.
Can You Put a Toilet Brush in a Dishwasher?
No – a toilet brush shouldn't go in the dishwasher, even on a hot cycle. Running it alongside dishes, cutlery, or anything else that touches food creates an unnecessary cross-contamination risk. A dishwasher is designed to clean food-related items, not bathroom cleaning tools that can carry toilet waste and other contaminants. The heat and detergent also aren't a substitute for properly disinfecting a toilet brush.
If the brush needs a deeper clean, hand-washing and disinfecting it as described above is the safer option. The same applies to the brush holder: clean it separately with an appropriate disinfectant rather than putting it in with your dishes. If the brush is difficult to clean thoroughly or still smells unpleasant after washing and drying, replacing it is more hygienic than trying to clean it in the dishwasher.
How to Keep a Toilet Brush Cleaner Between Uses
A toilet brush is one of the essentials that every home has, and because it gets used regularly, keeping it clean is necessary. Keeping a toilet brush hygienic between deep cleanings is mostly about controlling moisture and preventing residue from building up on the bristles. A few simple habits can make a noticeable difference and also help prevent the unpleasant smell that develops when a wet brush sits in a closed holder.
-
Rinse after every use: Give the brush a quick rinse under hot running water, or flush the toilet while holding the brush in the bowl. This removes residue before it has a chance to dry onto the bristles.
-
Let it drip-dry before storing: Hold the brush over the toilet bowl for a few seconds after rinsing so excess water can drain away. Putting a soaking-wet brush straight into its holder traps moisture and encourages bacterial and mold growth.
-
Don't let the brush sit in standing water: Check the bottom of the holder regularly and empty it if water has collected there. Wipe the inside clean and let it dry before putting the brush back. A self-draining or ventilated holder can help prevent water from pooling in the first place.
-
Give the holder some airflow: Avoid placing the holder in a tight corner where damp air gets trapped. Better ventilation helps the brush dry faster and reduces musty odors.
-
Don't cover a damp brush: If your holder has a lid or enclosed design, make sure the brush is reasonably dry before closing it. A closed, humid space can keep the bristles wet for much longer than necessary.
Signs It's Time to Replace Your Toilet Brush
A toilet brush doesn't last forever, no matter how well you clean it. Over time, the bristles become less effective at scrubbing and can hold onto residue that is difficult to remove. Replace yours if you notice:
-
Frayed, bent, or falling-out bristles: Once the bristles lose their shape, they won't scrub the bowl as effectively, especially around the rim and other hard-to-reach areas.
-
A musty smell that doesn't go away: If the brush still smells unpleasant after a thorough clean and complete drying, the bristles may be holding onto bacteria, mold, or residue that is no longer worth trying to remove.
-
Rust on the metal parts: Rust can develop when a metal handle or wire stays wet repeatedly. Besides making the brush harder to clean, corrosion can eventually weaken the handle or cause rough, sharp areas.
-
Stubborn discoloration or staining: Some staining is simply cosmetic, but if the bristles remain visibly dirty even after cleaning and disinfecting, replacing the brush is a more practical option than repeatedly trying to restore it.
Most toilet brushes last around 6 to 12 months with regular use and proper care, although there is no fixed expiration date. A brush used frequently may need replacing sooner, while one that's only used occasionally can last longer. Rather than replacing it simply because a certain number of months have passed, look at the condition of the bristles, the handle, and how well the brush can still be cleaned and dried. Once it no longer cleans effectively or stays fresh after washing, it's time for a new one.

Brosse WC créative nordique en céramique
Frottez comme un roi – Design marbré avec une touche dorée ! Améliorez votre routine de nettoyage de salle de bain avec le set de brosse de toilett...

Brosse WC moderne avec grattoir nettoyeur
Solution élégante et simple pour une salle de bain plus propre Gardez votre salle de bain fraîche et sans tracas avec ce goupillon de toilette mini...

Ensemble porte-brosse WC en céramique texturée
Apportez une texture luxueuse à votre espace de salle de bains Élevez votre routine quotidienne avec ce support de brosse de toilette en céramique ...
Conclusion: Keep Your Toilet Brush Clean and Sanitary
Keeping a toilet brush sanitary doesn't have to become another time-consuming bathroom chore. Most of the difference comes from a few simple habits: don't leave residue sitting on the bristles, don't store the brush while it's soaking wet, and don't forget that the holder needs cleaning too. A deeper clean from time to time then takes care of the buildup that regular rinsing can't remove.
It's also worth treating the brush as a cleaning tool that eventually needs replacing, rather than something that can be kept indefinitely with enough disinfectant. Once the bristles become worn or the brush can no longer be cleaned properly, a new one gives you a cleaner starting point. With the right care, though, your toilet brush can stay fresh, effective, and ready to do its job without becoming a source of unpleasant smells or extra germs in the bathroom.


